
Reviewed · TEMPLES AND SHRINES
Kyoto: Calligraphy class at Buddhist temple in city center
Ink can turn into a lasting Kyoto memory. This 70-minute class brings you into a traditional Buddhist temple in central Kyoto, where a Japanese calligraphy teacher guides you through brush technique, basic strokes, and one final kanji or word of your choice. I especially like the small groups of up to six and the chance to create a real souvenir rather than buy another mass-produced trinket.
The setting is another strong point: you work in a washitsu with tatami flooring, near a Great Buddha in the heart of the city. The main thing to consider is the seating. Most people sit on the floor with a zabuton cushion, and limited desks are available, so this may be tiring if your legs or knees do not handle floor seating well.
In This Review
- Key points at a glance
- Why this Kyoto calligraphy class feels different
- Finding Seigan-ji Temple in Shinkyogoku
- The first 10 minutes: meeting the teacher and choosing your character
- The calligraphy tools and basic brush strokes
- Working with the teacher and translator
- Creating your final piece on shikishi
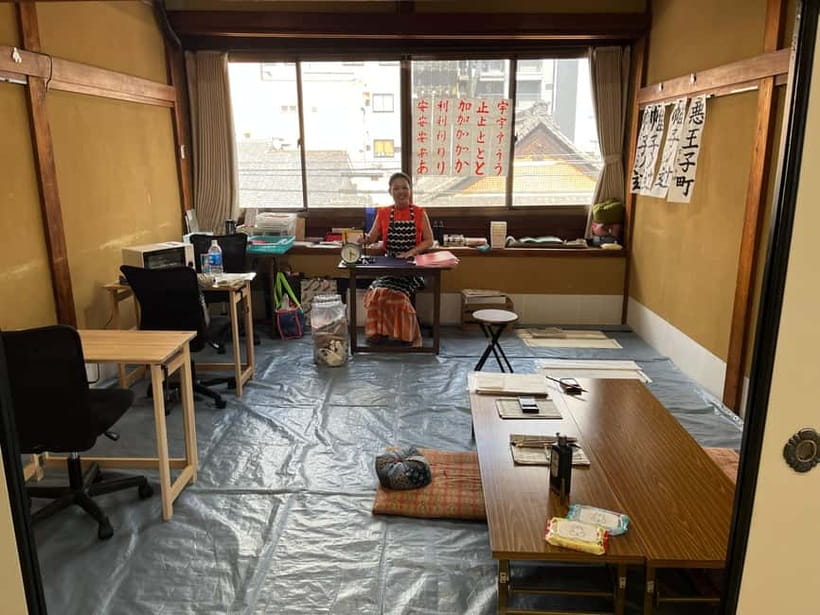
- The temple atmosphere and tatami seating
- Is $55 a fair price for 70 minutes?
- Who should book this class?
- Small details that improve the experience
- FAQ
- How long does the Kyoto calligraphy class last?
- Where do I meet the teacher?
- What languages are available?
- Do I need to bring calligraphy supplies?
- Can I take my calligraphy home?
- Is the class suitable for wheelchair users?
- Should you book this Kyoto calligraphy experience?
Key points at a glance
- A working temple setting: Meet outside Seigan-ji Temple in the covered Shinkyogoku shopping street, then enter a traditional Japanese room for the lesson.
- A clear step-by-step class: You learn how to hold the brush, practice basic lines, work on your chosen character, and finish a piece on shikishi cardboard.
- A personal souvenir: Take home your finished calligraphy and receive a key chain made with your selected character.
- Small-group attention: The class is limited to six people, giving the teacher and translator time to offer individual tips.
- Several language options: Instruction is available in English, Spanish, Japanese, and Dutch.
- A useful practical note: Bring a few ideas for a word or kanji before class, and wear footwear since bare feet are not allowed.
Why this Kyoto calligraphy class feels different
Kyoto offers plenty of temples, shrines, markets, and formal cultural shows. This class gives you something more hands-on. You do not simply watch a calligrapher produce a perfect character while you stand at a distance. You pick up the brush, make uneven lines, practice again, and eventually put your own work on paper.
That matters because Japanese calligraphy, or shodo, is not only decorative writing. It connects writing with posture, control, concentration, and the structure of kanji. The class introduces those ideas in a compact way without requiring prior art experience.
I like the balance between instruction and making. You receive enough guidance to understand the tools and the order of the strokes, but the finished piece still belongs to you. It will not look exactly like the teacher’s work, and that is part of its value.
The setting adds something that a hotel activity could not. The class takes place in a traditional temple room with tatami mats and Japanese sliding doors. The location is in central Kyoto, close to the Shinkyogoku shopping street, so you can fit it into a day of sightseeing without heading far outside the city.
More Temples and Shrines in Kyoto
- [Kyoto & Nara Day Tour] Sagano Scenic Railway & Nara Park & Fushimi Inari Taisha Thousand Torii Gates & Togetsukyo Bridge & Bamboo Grove & Kimono Forest (Departing from Osaka)
★ 4.9 · 10,942 reviews - Kyoto: Fushimi Inari, Kinkakuji, Bamboo Grove 1 Day Bus Tour
★ 4.8 · 4,316 reviews - Kyoto: Tea Ceremony in a Traditional Tea House in Kiyomizu
★ 4.9 · 3,519 reviews
Finding Seigan-ji Temple in Shinkyogoku
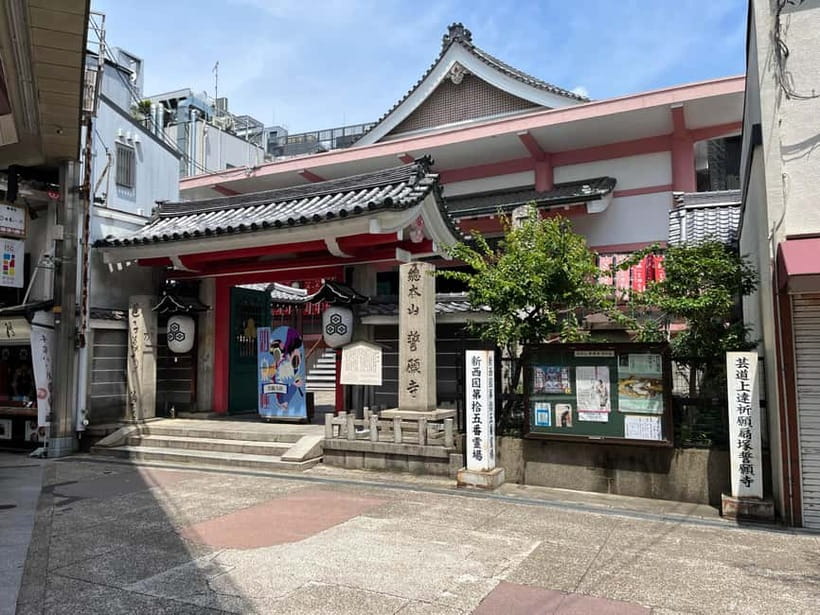
The meeting point is in front of Seigan-ji Temple, under the roofed section of the Shinkyogoku shopping street. Look for a person holding a red lantern on a stick.
This detail is important. The instructions specifically ask you not to climb the temple stairs looking for the workshop and not to interrupt monks or other temple staff. Wait at the front for the person with the lantern. If you have trouble, use the email address or phone number provided with your booking information.
Shinkyogoku is a busy shopping arcade, so give yourself enough time to locate the entrance. The temple may be surrounded by ordinary city activity, but the class itself takes place in a much quieter part of the building. That contrast is one of the pleasures here: Kyoto’s commercial center is just outside, while inside you sit on tatami and work with ink.
You should read the information on your voucher carefully after booking. The meeting instructions are unusually specific, and following them will save you from wandering up temple steps or asking the wrong person for help.
The first 10 minutes: meeting the teacher and choosing your character
The session begins with introductions to the Japanese teacher and the translator. The teacher has more than a decade of calligraphy experience, and several participants found the instruction patient, encouraging, and easy to follow through translation.
The language setup is worth understanding. The calligraphy teacher may teach in Japanese, while the translator explains the steps in your chosen language. English, Spanish, Japanese, and Dutch are offered. If you prefer one of those languages, select it carefully when booking.
Next comes the most personal decision of the class: choosing what to write. You can select a kanji or word from examples provided at the temple, but it is better to arrive with a few ideas. A name, a value, a feeling, or a simple word connected to your Japan trip can all work well.
You do not need to know Japanese to choose a character. The teacher and translator can help you work from the available examples. Still, preparing several possibilities makes this part easier and gives you more time for the actual brushwork.
One useful lesson is that a kanji is not just a pretty symbol. Its shape, order of strokes, and meaning all matter. The introduction gives you a small look at how the character is built rather than treating it as an abstract design.
The calligraphy tools and basic brush strokes
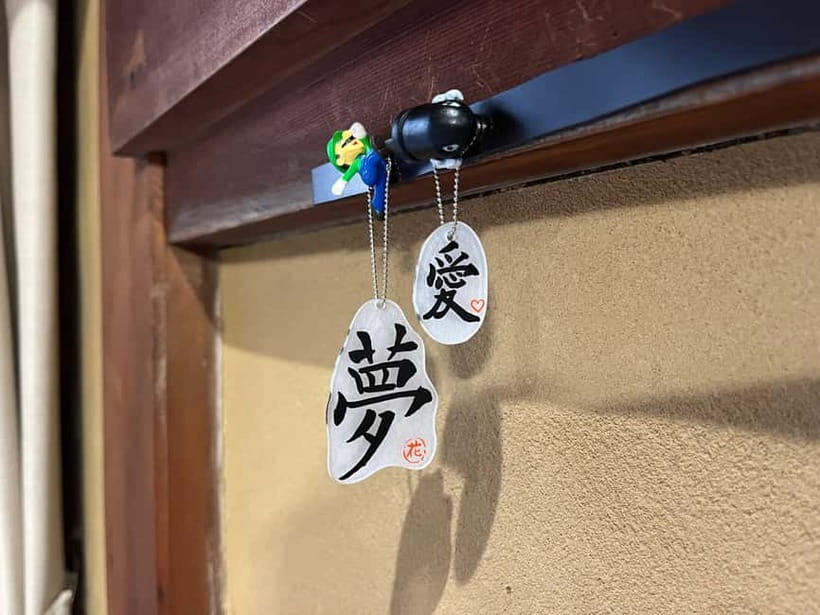
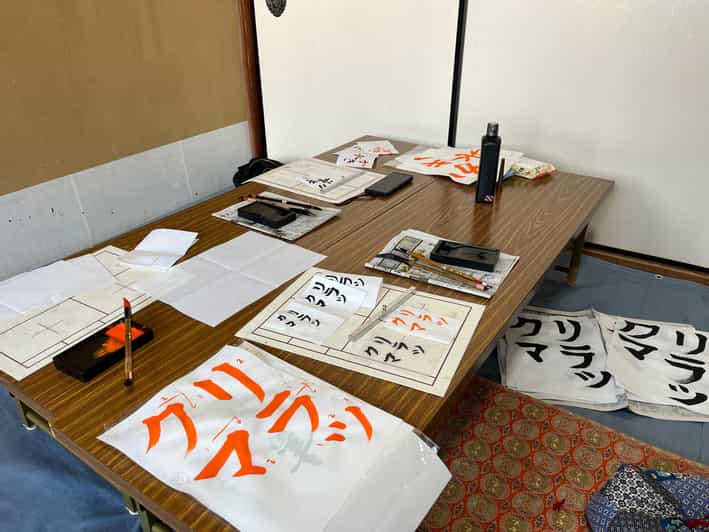
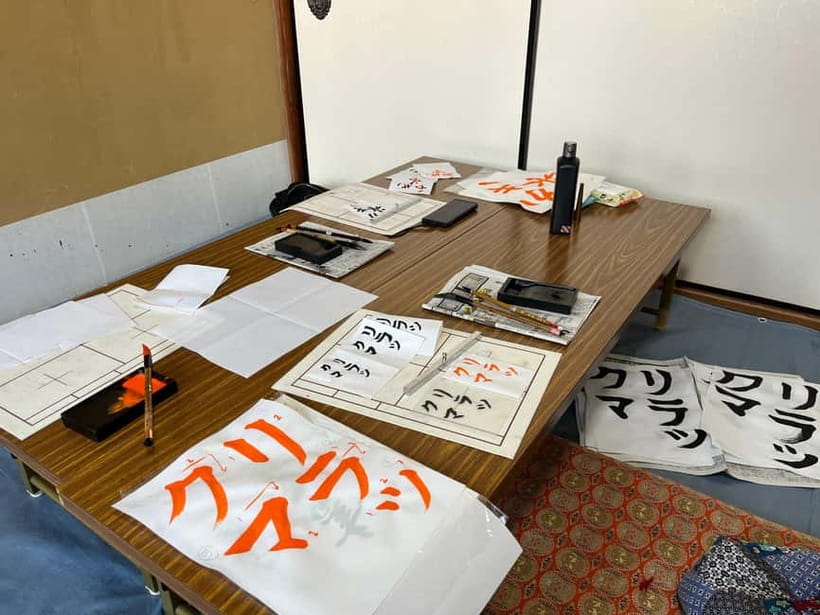
The class supplies the materials, including washi paper, a brush, ink, bunchi, and shitakami. You also receive explanations and practice sheets with kanji examples.
The teacher first shows how to use the tools. Then you practice basic lines before attempting the character you selected. This gradual approach is helpful because calligraphy looks simple until you try to control the brush yourself.
You learn that pressure and movement affect the line. A stroke can become thick, thin, dark, or light depending on how you handle the brush. Small changes in speed and pressure alter the character’s balance.
Do not rush through the practice stage. At the same time, the teacher advises against writing endlessly. Too much practice can tire your arm, and a tired arm may produce a weaker final piece. The aim is not to fill every scrap of paper. It is to learn enough, rest your hand, and make one thoughtful final attempt.
The atmosphere is usually quiet, but not completely silent. People concentrate on their strokes, while the teacher and translator offer guidance. If you want a loud, highly social activity, this may feel subdued. If you enjoy focused work, the calm room is a major advantage.
A completely different kind of day out:
- PERFECT KYOTO 1-Day Bus Tour
★ 5.0 · 13,518 reviews - Kyoto: Gion Make Your Own Chopsticks with Engraving Option
★ 5.0 · 3,465 reviews - Kyoto Nara Day Trip │ Kiyomizu-dera Temple + Fushimi Inari-taisha Shrine + Nara Park (Departing from Osaka/Kyoto)
★ 4.7 · 3,408 reviews - Kyoto Geisha Walking Tour: Gion District & Hidden Gems
★ 4.7 · 3,273 reviews
Working with the teacher and translator
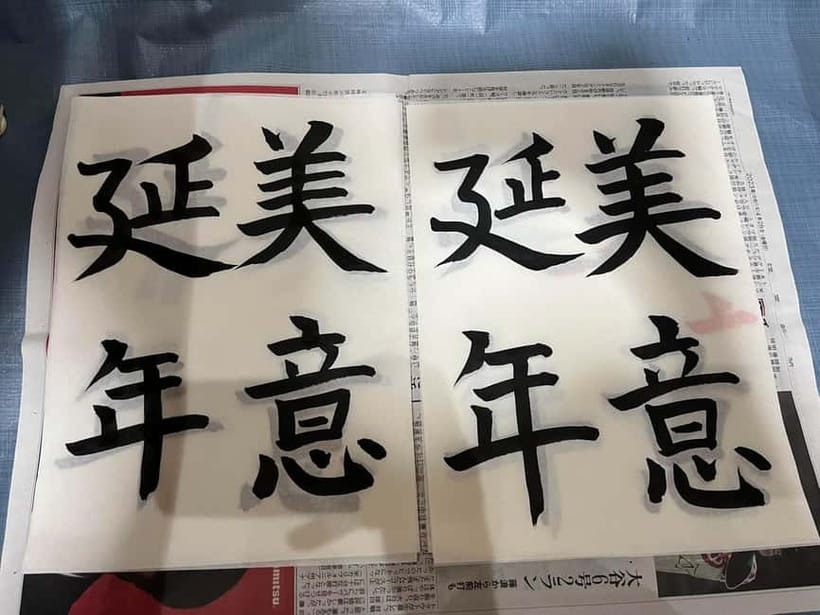
The teacher demonstrates the process and then checks your practice. The translator explains the instructions and helps bridge the language gap. This combination is central to the quality of the class.
Individual attention is possible because the group is capped at six. Smaller sessions may have only two or three participants, which can give you more direct correction and encouragement. The teacher and translator may also help with names and suggest ways to improve your technique.
The translator can add a friendly human side to the lesson. Some sessions include conversation about life in Japan, personal interests, or everyday topics, giving you more contact with local culture than a scripted demonstration would provide. Photography help is also available during the activity, and the guide may take pictures as you work.
The instruction is supportive, but do not expect to produce professional calligraphy in 70 minutes. The class teaches a beginner’s method and lets you make a pleasing personal piece. The teacher’s results will look effortless because of years of practice. Your own work will show that you are learning, which is exactly why it makes a meaningful souvenir.
Left-handed participants should be prepared for an extra challenge. Traditional brush technique can feel less natural in the left hand, although one participant found it useful to try the right hand as well. If you are left-handed, tell the teacher or translator and accept that the process may require more adjustment.
Creating your final piece on shikishi
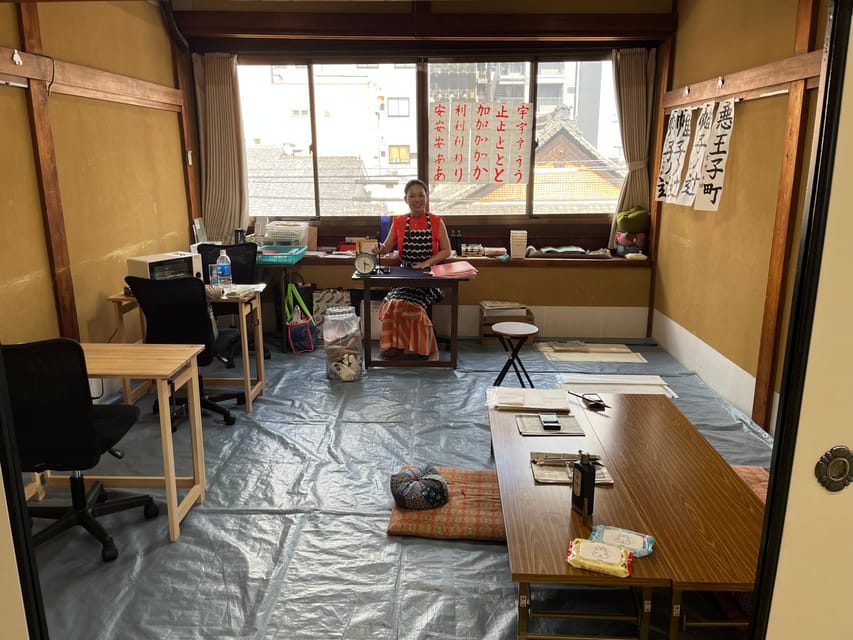
After practicing lines and your selected kanji, you move to the final artwork. You write the character on shikishi, a special square cardboard board commonly used for calligraphy and painted inscriptions.
This is the moment when the earlier practice becomes useful. You have already tested the shape, learned the stroke order, and received corrections. Now you must commit to one version. There is no erase button, so the process rewards patience.
The final piece is more substantial than a loose practice sheet. You can display it at home on a wall, shelf, or mantel. It also packs more easily than many physical souvenirs, although you should protect it from bending and moisture during the rest of your trip.
You take the finished work home. The teacher also makes a key chain featuring your chosen character as a special gift. That small extra item gives you a second reminder of the class and makes the activity appealing for couples, families, and friends who want matching or related characters.
The souvenir is not valuable because it is flawless. It is valuable because you selected the word, learned the method, and made the final brush marks yourself.
The temple atmosphere and tatami seating
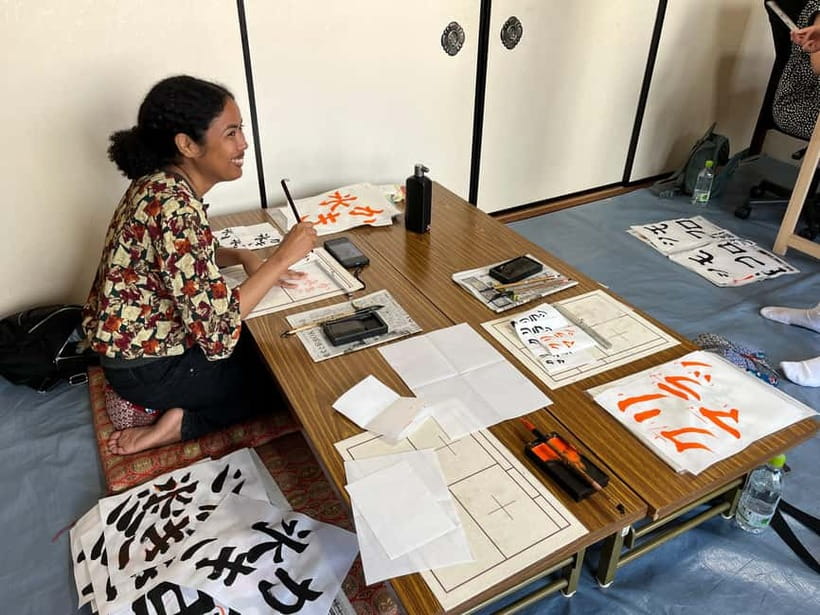
The temple location is not just a backdrop for photographs. You enter a Japanese-style room with tatami flooring, an experience that many visitors do not get from simply viewing a temple exterior.
You may notice the quiet, the floor-level arrangement, and the sliding doors. The room provides a direct introduction to the physical side of Japanese tradition: removing outdoor shoes, sitting carefully, handling materials respectfully, and working at a low surface.
Bare feet are not allowed, so wear socks or hosiery. Smoking, vaping, alcohol, and drugs are also prohibited.
Most seating is on the floor with a zabuton cushion. Some desks are available, but they are limited. Floor seating may be uncomfortable for anyone with knee, hip, or back concerns. The activity is listed as wheelchair accessible, but the tatami-room arrangement is still something you should consider before reserving.
The class is not designed as a silent meditation session. People talk when needed, and the translator provides explanations. Still, the concentration required for writing keeps the tone generally peaceful.
Is $55 a fair price for 70 minutes?
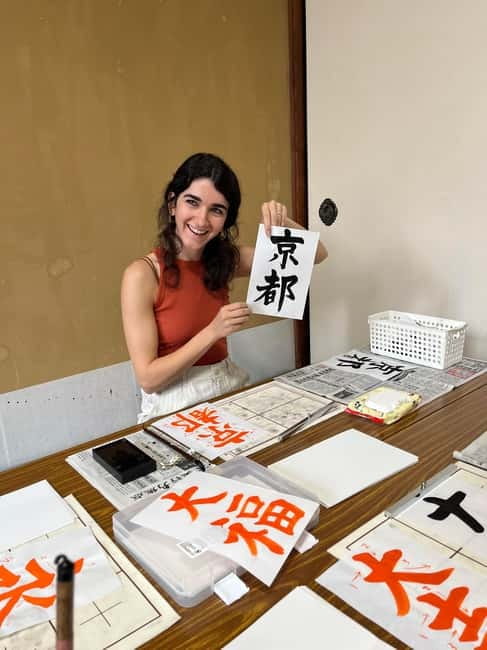
At $55 per person, this is not the cheapest cultural activity in Kyoto. You are paying more than the cost of buying a calligraphy brush or a printed souvenir from a shop. The value comes from the setting, the instruction, the supplied materials, the finished shikishi artwork, and the personalized key chain.
The small group makes the price easier to justify. You are not sitting in a large classroom watching a distant teacher. With six people or fewer, the teacher and translator can look at your strokes and offer practical advice.
The location also saves time. Since Seigan-ji is in the city center, you can combine the class with shopping in Shinkyogoku and nearby sightseeing. A 70-minute session fits neatly into a busy Kyoto schedule and provides a seated change of pace after walking through the city.
I would consider it good value if you care about doing something rather than simply seeing something. It is less attractive if you want a long, advanced lesson or a formal temple tour. The class gives you a beginner’s introduction and a keepsake, not a full course in shodo.
Food and drinks are not included. You can buy drinks from vending machines outside the temple, so plan this around your day rather than expecting refreshments during the session.
Who should book this class?
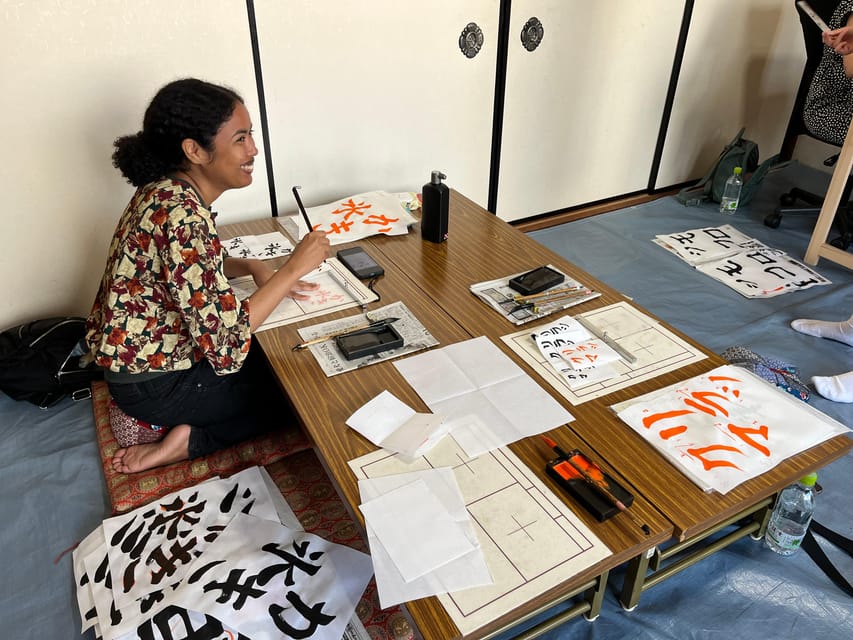
This activity suits adults, couples, solo visitors, and families with older, well-behaved children. The minimum age information is inconsistent, listing several restrictions for children under two, three, four, and five, so check the exact age requirement shown during booking if you are traveling with a young child.
You will get the most from the class if you enjoy quiet concentration and are willing to make mistakes. Artistic talent is not required. In fact, beginners often benefit most because the teacher builds the lesson from basic strokes.
It is a good choice for someone who has already seen several major Kyoto temples and wants a more active cultural activity. It also works well on a day when you need a slower hour between shopping, meals, and sightseeing.
I would hesitate to recommend it to anyone who cannot sit on the floor comfortably, dislikes guided creative tasks, or needs a fully accessible visual format. The activity is not suitable for visually impaired people, and babies under one year are not accepted.
Small details that improve the experience
Think about your word or kanji before you arrive. Prepare two or three options, since you may change your mind after seeing the examples.
Wear socks and comfortable clothing that allows you to sit on the floor. The rules prohibit bare feet, and the low seating can become tiring.
Save your strongest effort for the final board. Practice is important, but too much writing can fatigue your arm and affect the finished character.
Allow time to find the red lantern outside Seigan-ji. Do not go up the stairs to search for the class. Wait at the entrance as instructed.
Keep the artwork flat and dry after class. The shikishi board is made to display, but it still deserves care while you carry it through Japan.
If you speak English, Spanish, or Dutch, confirm that you have chosen the right language option. The translator’s explanations are an important part of understanding the teacher’s demonstrations.
FAQ
How long does the Kyoto calligraphy class last?
The class lasts about 70 minutes.
Where do I meet the teacher?
Meet in front of Seigan-ji Temple in the covered Shinkyogoku shopping street. Look for a person holding a red lantern on a stick.
What languages are available?
The activity is available in English, Spanish, Japanese, and Dutch.
Do I need to bring calligraphy supplies?
No. Washi, a brush, ink, bunchi, shitakami, explanations, practice materials, and kanji examples are included.
Can I take my calligraphy home?
Yes. After practicing, you write your chosen word or kanji on shikishi cardboard and take the finished artwork home. You also receive a key chain made with your chosen character.
Is the class suitable for wheelchair users?
The activity is listed as wheelchair accessible. Most seating is on the floor with a zabuton, however, and desks are limited, so consider whether the room arrangement will work comfortably for you.
Should you book this Kyoto calligraphy experience?
Book it if you want a personal souvenir, a calm hands-on activity, and a glimpse inside a traditional temple room. The combination of a skilled Japanese teacher, helpful translation, a group of no more than six, and a finished piece to take home gives the hour real substance.
I would especially choose it for a first visit to Japan, a couple looking for a shared activity, or anyone who has already spent enough time rushing between famous sights. Bring a few word ideas, wear socks, prepare for floor seating, and meet the red lantern at the temple entrance. For $55, you get more than a brush lesson: you get a small piece of your Kyoto day made by your own hand.
Just added in Kyoto
- The “Golden Route” and Ancient Japan by DIAMIR Erlebnisreisen – 14-Day Tour★ 2.0 · 2 reviews
- Japan: Castles & Cuisine by G Adventures – 6-Day Kyoto to Osaka Tour★ 4.5 · 4 reviews
- Cycle Japan by Explore! – 13-Day Kyoto to Tokyo Tour★ 4.7 · 12 reviews
- Cycle Japan by Intrepid Travel – 11-Day Kyoto to Tokyo Tour★ 4.8 · 2 reviews
- Classic Japan by Intrepid Travel – 11-Day Kyoto to Tokyo Tour★ 4.4 · 14 reviews
- Ancient & Modern Japan 14-Day Tour by Exodus Adventure Travels★ 4.4 · 40 reviews
- 5 Day Cultural Adventure of Kyoto, Nara & Osaka by Tourist Journey★ 2.5 · 2 reviews
- 12 Days Kinosaki Onsen Escape: A Journey Through Japan’s Timeless Towns by UME Travel★ 4.8 · 5 reviews
Temples and Shrines, compared.
![[Kyoto & Nara Day Tour] Sagano Scenic Railway & Nara Park & Fushimi Inari Taisha Thousand Torii Gates & Togetsukyo Bridge & Bamboo Grove & Kimono Forest (Departing from Osaka)](https://media.japanvisits.com/wp-content/uploads/kyoto-nara-day-tour-sagano-scenic-railway-nara-park-fushimi-inari-taisha-thousand-torii-gates-togetsukyo-bridge-bamboo-grove-kimono-forest-departing-from-osaka-k110001-400x257.jpg)
Kyushu One-Day Tour: Yufuin no Mori Train & Yufuin Town & Nyoirin-ji Temple & Dazaifu & Hell Hot Springs (Departing from Fukuoka)
Read our review →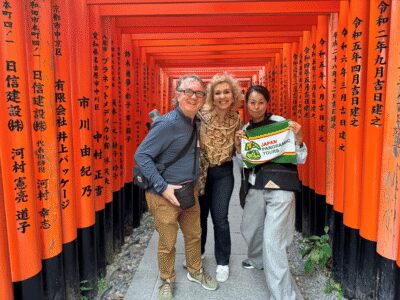
Fushimi Inari, Kinkakuji, Bamboo Grove 1 Day Bus Tour
Read our review →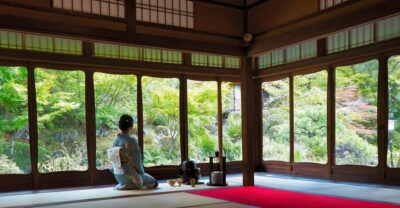
Tea Ceremony in a Traditional Tea House in Kiyomizu
Read our review →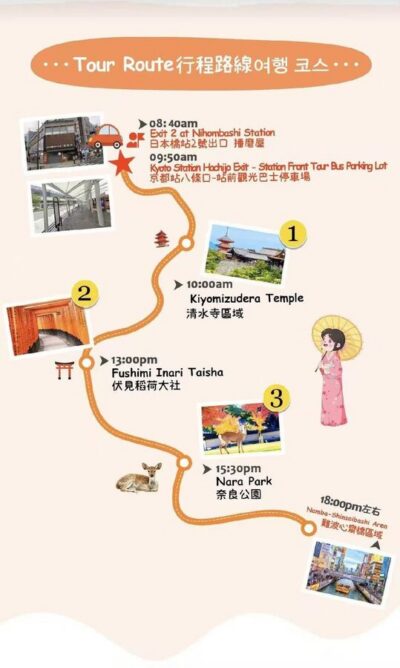
Kyoto Nara Day Trip │ Kiyomizu-dera Temple + Fushimi Inari-taisha Shrine + Nara Park (Departing from Osaka/Kyoto)
Read our review →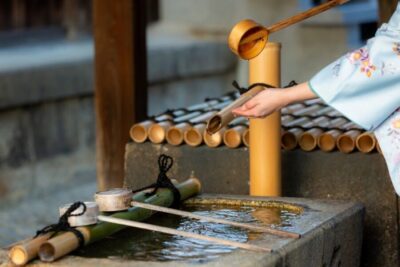

Browse the lists this tour appears in